|
The information contained in this document is intended for the sole use of Canadian Challenger owners and is strictly proprietary and confidential.
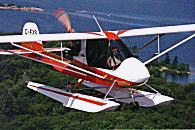
It goes without saying that you should ALWAYS get properly checked out by a competent Challenger instructor before attempting to fly your airplane. Under no circumstances, regardless of experience level, should you consider flying without a proper check out. With experience, you will find the plane to be extremely capable, very easy and forgiving but its extremely slow speed capabilities make it somewhat different from conventional aircraft. Accidents have occurred when pilots have performed first flights without a type checkout. Preflight Check all flight and control surfaces, attach points, hinges, control linkages and connections. Double check that the lower strut attach (rony) brackets are fastened with the bolt head outside the fuselage and the nut inside the fuselage. Also check that rudder, aileron and throttle cable casings have been flooded with WD40 if you are going flying in potentially freezing temperatures. Because this plane is so capable as a glider, if you can learn to think, plan and fly like a glider pilot, then engine related items are relevant but far less important than flight critical flying surfaces and controls. Start Cold - 2 shots of prime (if equipped with a primer), full choke, no throttle, turn until engine fires. Choke off, throttle to 2000 - 2400 max, warm up 8 minutes. Hot - No choke, no throttle until it fires. If flooded, no choke, full throttle and turn until it fires, close throttle. Taxiing Taxi slowly - a gust can get you flying if you're not careful. Position the controls (ailerons and elevator) to keep the wind from affecting the plane. One aspect of the controls that is different to some pilots is that the rudder pedals in the Challenger pivot about their mid point. To give rudder you will be pushing with your toe, not your entire foot. This may take some getting used to if you have previously been flying an airplane where pushing your toe is used only when applying the brakes. Pre Takeoff Check CISFFRT Takeoff Remember there's nothing more useless than runway behind you. Keep the elevator neutral until 35 mph, increase speed in ground effect, raise flaps, climb at 40-45. Note: If your plane is fully loaded and/or carrying floats, these speeds will need to be somewhat higher. Also be aware that flaps down generates nose down trim, so back stick pressures will be very high until they are raised. In Flight Temperatures - Carefully watch the temperatures during break in and the first hours of flight. Rotax say that the 503's temperature should be kept below 480 degrees Fahrenheit. I strongly believe however, that it is far better to keep the temperature under 400 degrees Fahrenheit. The engine will initially run hot and 400 can be easily exceeded if you are not careful. Thrust line - Be aware the plane has a high thrust line. Sudden application of power will cause a pitch down and sudden cutting of the throttle will cause a pitch up. Traffic lookout - In this high wing plane you CAN see traffic while banking. Don't forget to keep looking. Aircraft at the horizon level are at your height and are the biggest threat. Maximizing range - For maximum range, use higher throttle settings to penetrate a head wind, throttle back to let a tail wind carry you. Tip - Fly high and slow or low and fast but never low and slow. Tip - To maintain constant airspeed, learn to fly by attitude. For a given rpm, keep the horizon fixed on a point of the windscreen and the airspeed will remain constant. Turns The Challenger's unusual ultra-low speed capability necessitates large ailerons to give positive control at speeds planes normally can't fly. These ailerons create adverse yaw which is corrected with rudder. This plane does not fly like a Cessna. It requires learning the use and coordination of rudder, just like a glider. Turns, in addition to aileron, typically require lots of rudder input, something most G/A pilots aren't accustomed to. Installing the doors creates a large surface area ahead of the axis of yaw. If you use the rudder improperly, the door area will catch the airflow and increase your error. If you do not feel confident, build time initially without the doors installed. When you get accustomed to proper coordination of the rudder, put the doors on and keep flying it the same way. You'll soon be right at home and find it easy. Tip - Install a yaw string (a short tuft of wool at the base of the windscreen) and practice keeping it straight. Side slips With the doors off - The Challenger side slips conventionally and very effectively. Maintain correct airspeed through attitude control (horizon on the windscreen) because the ASI may give incorrect readings at large yaw angles. Secure the rear seat cushions so they don't blow into the prop. With doors on - Because of the increased surface area ahead of the axis of yaw the side slip with doors requires a different technique. Initiate conventionally (cross controlled) but you will need to keep the plane in line by transitioning to some rudder (as needed) on the same side as the stick, otherwise the plane will wander out of line. Practice at altitude by slipping towards an object on the horizon. Getting comfortable with the airplane When you are checked out and flying solo, make the time to get a concentrated amount of flying time. Start in calm conditions and ease yourself into more aggressive conditions as your confidence grows. There are many pilots who fly sparingly, never getting a concentrated dose of flight time. They remain tentative and unsure of themselves, unconfident in adverse conditions, even though over time they may accumulate significant flight time. If you make the effort, you will quickly reach a comfort (safety) level that you will never regress from. If you don't, you won't. Use of flaperons The flaperons on the Challenger serve two functions. They decrease stall speed to help shorten landings and takeoffs. They also provide adjustable pitch trim. The overall range of their travel can be adjusted to suit the (front seat) weight of the owner by lengthening or shortening the aileron pushrods. Typically, from the full up position the first several turns of the crank will provide pitch trim for the full speed range of the Challenger. Be aware that the use of flaperons will make for increased stick pressures which you will need to resist to maintain a constant approach speed. Also be aware that at high speeds, the use of full flaperons can create an extremely heavy stick condition as the increased airflow increases the pitch down effect of the flaperons. If through inattention, while using full flaperons, a high or full power condition also exists (further increasing the nose down tendency and airspeed) and the speed is allowed to develop excessively, it can reach a point where it becomes impossible to resist the stick pressure and an increasingly steep dive will result. Reducing the power to idle and/or raising the flaperons will immediately correct the situation. Floats Puddlejumper amphibious floats are recommended. You will need to add an important item to your pre-landing check list. Gear up or down as required. Because of the different placement of the wheels in the floats, you will need to build more speed on takeoff from land before the plane will rotate. On the water, rotation will take place at the normal speed. Because of the additional weight that floats entail, raise climb and approach speeds by 5 mph. Tip - The use of full flaps will reduce takeoff distances on water considerably, particularly when heavily loaded. Tip - With flaps down, the large aileron surface area can also help maneuvering in windy conditions on water. Emergencies Tip - Remember that the sign of a superior pilot is one who uses his superior judgement to avoid using his superior skills. Tip - You have a plane that can take care of you if you ever have a power problem - if you fly it intelligently. Learn to fly like a glider pilot. Keep a landing possibility handy. If it's unlandable ahead, go higher so you can glide to safety or go around. Forced landing in unlandable terrain - If ever you have a power failure and you have flown into an unlandable area, pick a soft spot (trees are acceptable), point it into the wind, lower the flaps and fly it in at minimum airspeed. Do NOT stall it in. Tip - You can glide much farther with a tail wind, much less with a headwind but don't turn back into wind too low. Pre Landing Check SWAFT Important Notes On Landing Tip - Always fly circuit with runway attainable without power. Consider winds when judging circuit. ie; strong headwind on base = less penetration or the opposite. Adjust accordingly. Fly final at 55mph minimum, higher if necessary to protect from wind gradient, with engine set to idle to develop judgement skills. Think of the glide path as a hill of constant gradient. Identifying where the horizon falls on the windscreen and keeping it there (without moving the throttle position) will give you perfect speed control without the ASI. Do not bleed off airspeed until within 2 feet of ground, then round out and hold off at 1-2 feet until plane mushes into a landing by itself. Excessive height should be bled off with side slips, not diving. Practice precision landings. Tip - Occasionally add power briefly to keep engine warm in long descents. Tip - A poor approach usually results in a poor landing. A good approach usually results in a good landing. Tip - If the approach or flare is not quite right, give full throttle and go around. The Challenger will respond instantly and get you out of trouble. Tip - Don't let the speed drop until you're at a height you're willing to fall from. Practice flying with the engine off Height can always be traded for speed and distance. Start by turning the engine off when you're in easy reach of the runway on final, then progressively turn it off sooner until you can descend to and fly the circuit without power. Keep in mind the effects of wind on penetration. When you get comfortable engine off, start experimenting with soaring. The Canadian Flight reprint in the infopak will tell you how. Try it at first with the engine at idle, then without power. You'll love the experience and it will make you a better pilot. Tip - Never extend a glide by pulling back on the stick - start up and add power if you're too low. Ground School A good ultralight groundschool is highly recommended. Even if you already have a higher license, there are many subtle but important differences between these airplanes and general aviation aircraft. In any case, review of pertinent areas will always be useful. If you are not already licensed, groundschool is a requirement.
To learn and see more order our comprehensive information package and video! |